Hiển thị các bài đăng có nhãn home and garden. Hiển thị tất cả bài đăng

Chủ Nhật, 25 tháng 9, 2011

Embroidered pictures for home decor: spring button flowers tutoriral

LA7_0865b

Embroidered pictures for home decor: spring button flowers tutoriral

DSC_0016b


Today we are turning buttons into flowers and making a cute handmade display-piece! Enjoy :)
You will Need:
  • Buttons that feel "Flowery"
  • Neutral Fabric (mine was a fine linen colored cotton)
  • Embroidery Thread (I used a few greens for the stems & yellow for the flower centers)
  • Small Needle
  • Scissors
  • Pencil or Invisible Marker
  • An embroidery hoop to be used as a frame
Freckled_Nest_Diy
Step 1: Space out your buttons on the fabric and mark a little pencil dot where you want each one. Like the example above, make sure to leave room for the stem below each button.
Step 2: Sew on the buttons all at once with one color of thread. Visit this post for tips on how to start and end your stitching.
LA7_0865b
Step 3: Stitch a straight dashed line below each button, starting just under the button and ending at an 'invisible horizontal line'.
LA7_0904b
Step 4: Frame your fabric in an ornamental embroidery hoop, hide or trim the fabric overhang in behind (I taped mine on the back).
Step 5: Hang your new artwork :)
LA7_0988b
I hung mine above my desk at the Studio :) This project would be fun as a button swap with friends (you could even do it on a teatowel)! Try it :)
Interested in another Button Craft? Check out this Cork Frame Project :)
2

Thứ Sáu, 23 tháng 9, 2011

Art and easy crafts for kids: Crayon Art & Crepe Paper Flowers - a tutorial

If you're on Pinterest, there's a really good chance you've seen these melted crayon works of art.

Art and easy crafts for kids: Crayon Art & Crepe Paper Flowers - a tutorial
The boys and I made our pictures before I bought the frames.  I would suggest buying the frames first, so you know just how far the crayons need to be from the edges to fit in the frames.  I had to do some serious sanding on my frame, and the boys could have added another crayon to their pictures.

We were so excited to try this, that I forgot to take pictures (again!), but it's really easy.
What you'll need:
Canvas
Crayons (enough to cover 1 edge of your canvas)
Elmer's Glue
Blow Dryer and/or Space Heater
Wax Paper or newspaper
Small jar

1.  Put your canvas in your frame.  Use painter's tape to mark the edges of the frame on your canvas. 

2.  Take the canvas out of the frame & using more painter's tape, meet the edges of Step 1's tape.


3.  Remove the tape from Step 1.  You now know where you can put your crayons.

4.  Pick out your crayons.  We used 21 crayons for ours.  It was the perfect number for my frame, but we probably could have squeezed in a 22nd crayon for the boys.

5. On your work surface, line up your crayons the way you want them on your canvas.  Then, start applying the glue to your canvas, and add your crayons.

6.  Introduce your kids to some of your favorite big band songs, and dance around with them while waiting for the glue to dry.  It doesn't take long, about 10-15 minutes.

7.  Lay down some newspaper (we used a hand towel with some waxed paper on top), and prop the crayon side of your canvas up on your short jar.  With your space heater and/or blow dryer (make sure you have it on your lowest setting so it doesn't splatter the wax), start melting your crayons.

8.  Once the crayons start melting, you'll want to stand the canvas up more.  We did ours on the floor, so we just propped them up against the wall.

From left to right: Mine (when I did mine, I just had my canvas propped up on the jar, which gave me fatter drips), Awesome's (he picked his colors by how he wanted to see them mix, then wanted it hung horizontally to look like a machine gun!), and Bug's.

Now for the Crepe Paper Flowers

What you need:
Crepe Paper/Streamers
Glue
Scissors


Oops!  No Picture!
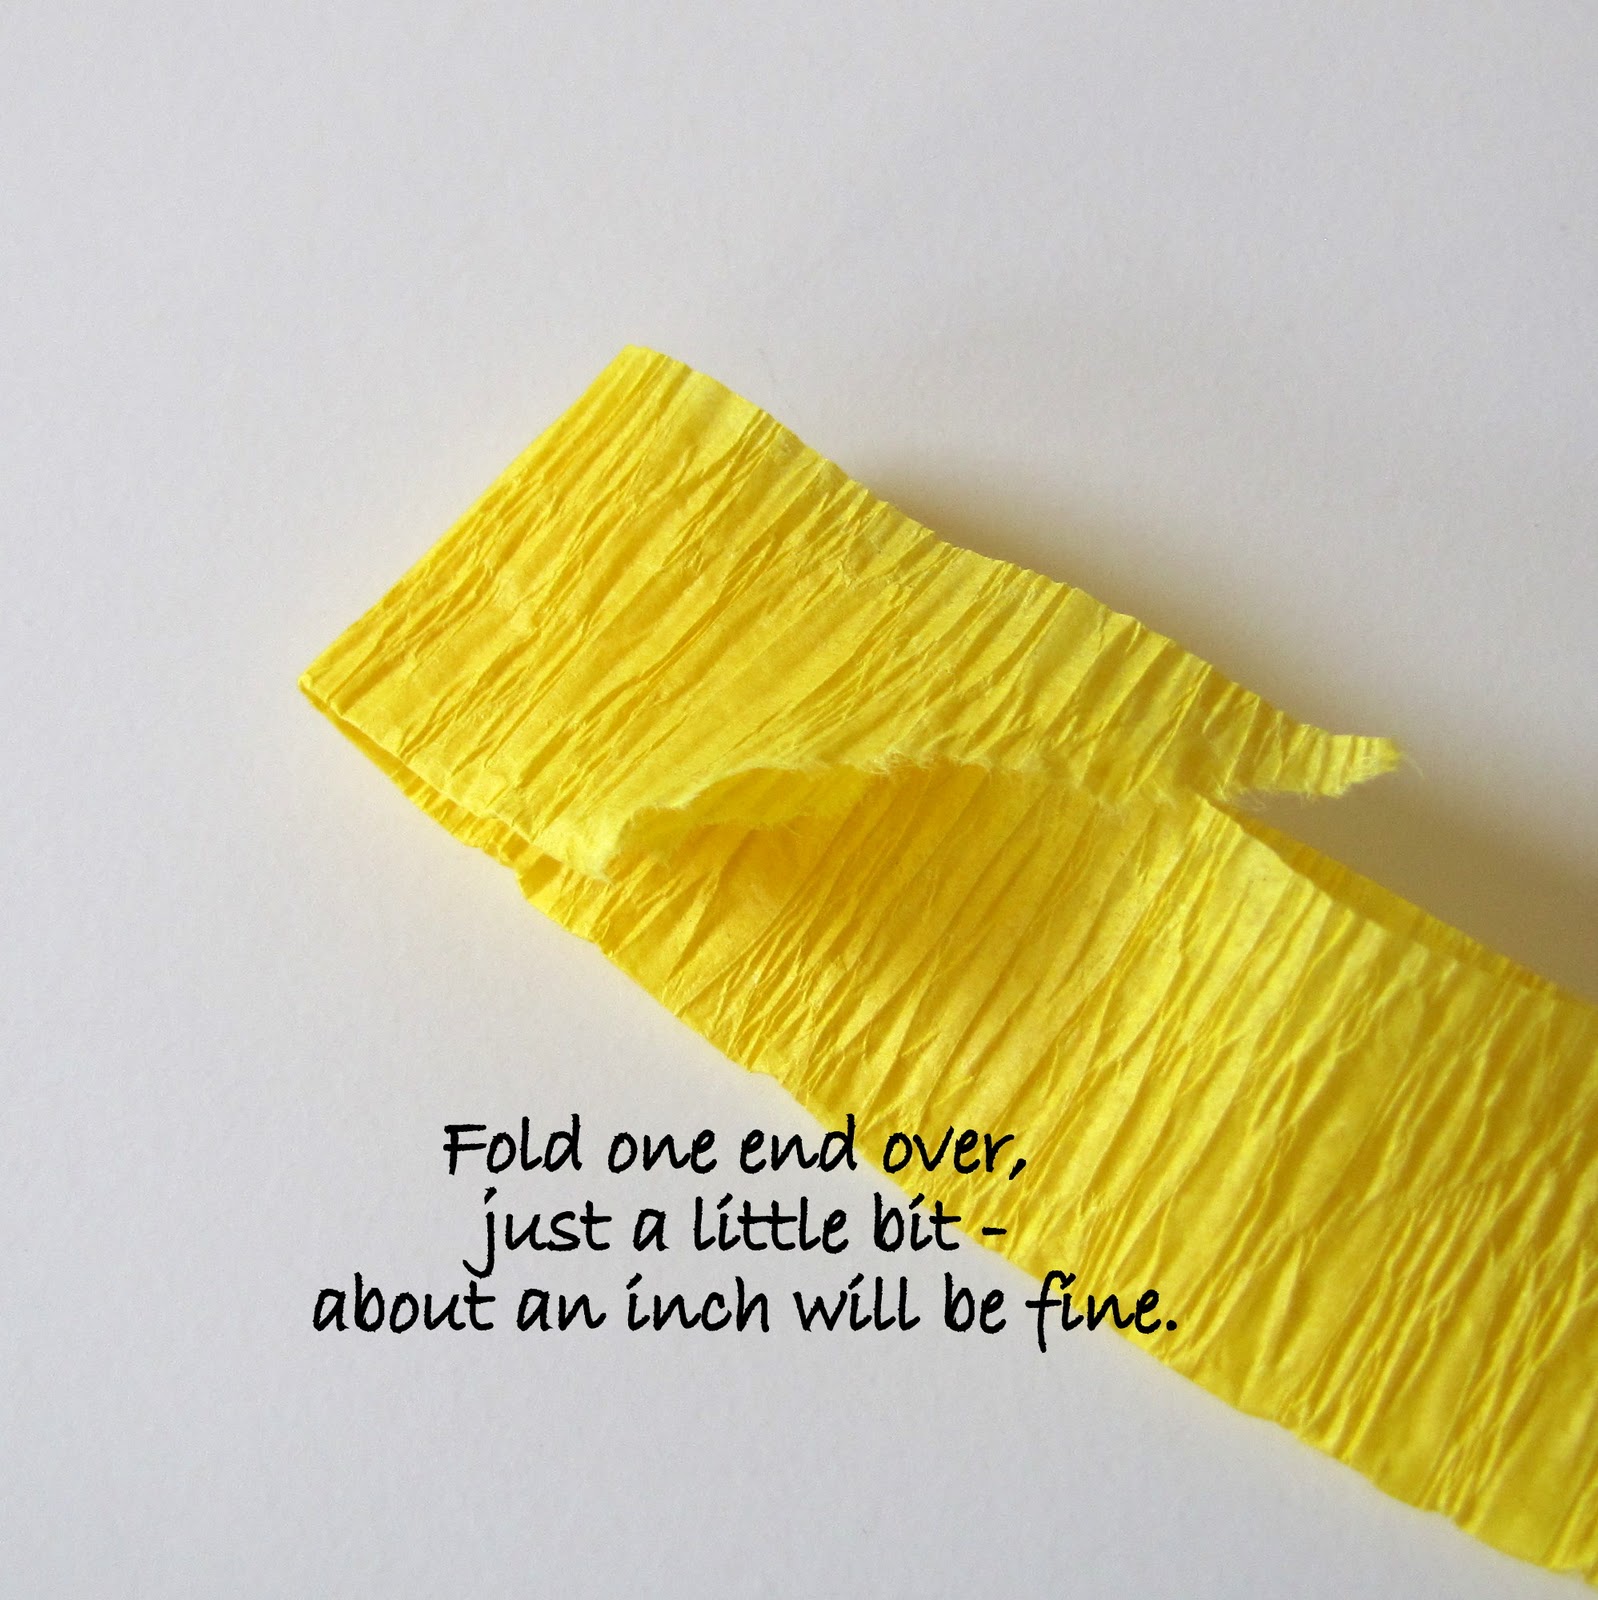
Stick your flower onto the glued area, then cut away the excess.


Thứ Ba, 20 tháng 9, 2011

Unique clock for your home: recycling paper ideas

http://g-cdn.apartmenttherapy.com/1165507/022210mcclock-01_rect540.jpg  
how to make a clock from junk mailhome


What You Need

Materials:
  • approximately 24 sheets of junk mail: this can be magazine sheets, grocery store ads, newspaper, whatever you'd like, as long as they are all the same size
  • pen or pencil used for rolling guide
  • scissors
  • tape (invisible works best)
  • long needle (a yarn needle works best)
  • embroidery floss
  • two clear CDs (the kind that protect your CD 50 packs)
  • round cardstock circle with hole punched in middle
  • battery-operated clock mechanism with hands

Instructions

1. To make a clock, 24 of these tubes will have to be created. Start by taking your pencil or pen, and use it as a guide to roll up your sheet of paper around it.
2. Tape each end of the tube with preferably invisible (matte clear) tape.
3. Fold approximately one third of the tube towards the other end, as shown above. As mentioned before, you will make about 24 of these, and its pointed tapered end will help create the round effect needed for your clock.
4. Take a long, thick sewing needle, (a yarn needle works best) and thread your embroidery floss through. Pierce the folded pointy end of the folded tube. Color doesn't matter for the embroidery floss--it won't show.
5. Thread the floss through the first end again, creating a "knot" that will prevent the thread from slipping through. Don't pull too hard! Next, begin to sew the additional 23 pieces onto your clock.
6. Take one of your clear CDs and place the middle hole above the hole that forms naturally in the center of the starburst. This will be the back of the clock, so choose whichever side you'd like to be the back.
7. Take your battery-operated clock mechanism and place the rod that holds the hands into the starburst and clear CD holes.
8. Flip the clock over and place the other clear CD above the hole on the other side.
9. Take your pre-punched paper circle and place on the mechanism. You may be wondering why this piece is necessary...it keeps all of the parts together and allows the nut to be threaded onto the rod. The hole of the cd has too big of an opening to keep all of the parts together tightly.
10. Screw on the nut tightly. Almost done!!
11. Add your hands!
12. AND VOILA! You have a totally unique recycled atomic starburst clock that's green and swanky!!

Chủ Nhật, 18 tháng 9, 2011

Crafts for home decor: Lamp Revamp tutoriral


Lamp Revamp

What can I say......this lamp is UGLY!!! Does it not scream thrift store 70's special! I am sure you have all seen something like this at your grandmas back in the day.  But for $5 I thought I would take it home...hey it worked and we all know a little spray paint can go along way!
But that shade had to go it not only had the look, but the smell of the 70's!....... I was not going to be putting that on my bedside table!


I found this new shade for $1 it was a nice shade but just not the look I was going for.

After washing and sanding down the base, I sprayed it with Krylon in brushed metal.  I ripped a part the shade and added some ivory polyester fabric.  I cut out leaf shapes and frayed the edges then I started attaching them to the shade to look like flowers, I like how it gives it some texture.  It's a little hard to see the detail in this picture ....again my photography stills are lacking.


You can see the detail a little better when it's all lit up.  I didn't expect it to look like this when turned on, but its kind of neat.  It's a little small for the scale of my large bed, it will be going in the guest room.  But not bad for $6 (I had the fabric and paint).

Crafts for home decor: Paint Projects – stenciling tutorial

Here’s a quick tutorial for adding a stenciled design to a hutch. You can search for a similar piece, or use this project as a springboard for your own ideas for a piece you already have.
For this project, you’ll need semigloss paints, stencils, stencil adhesive, a stencil brush, and paper towels. Creative positioning of stencils is what makes this design one-of-a-kind. Notice how the cherry blossoms seem to grow right up the back of the hutch and over the doors.
1. Base-coat the hutch with semigloss paint and let it dry.
2. Spray a thin coat of stencil adhesive on the back of the stencil, as shown here, and position the stencil on the hutch.

 
3. Lightly dip a stencil brush into paint, dab off the excess on a paper towel, and brush in the open areas of the stencil using a pouncing motion. Work from the inside of the stencil toward the outside, making sure the stencil is stuck down tightly so the paint won’t bleed under. It’s best to apply the paint in two or three thin layers rather than one thicker one, but there’s no need to allow the paint to dry completely between coats.
 
4. Carefully remove the stencil and reposition it, or choose another of the stencils in the set, and continue stenciling until you have a grouping of motifs that you like. Remember, you can use a stencil upside down, backward, or any way that suits your design.

Thứ Tư, 14 tháng 9, 2011

Schattengewachs - house plants out of the light


Schattengewachs – домашние растения из света 

Schattengewachs - house plants out of the light

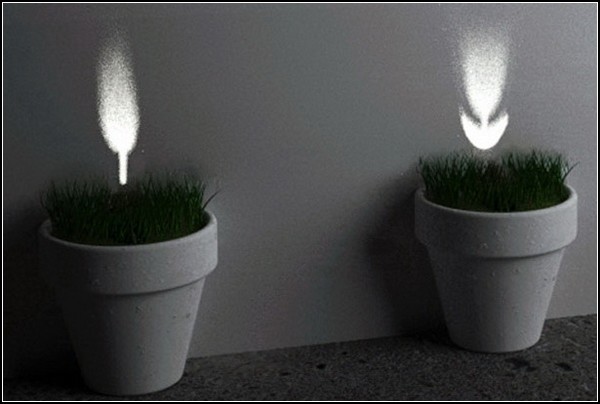
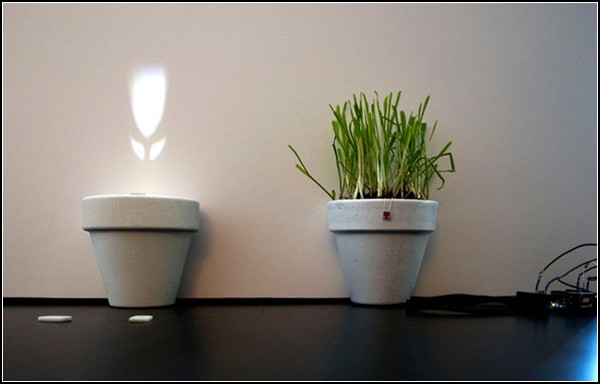
Many people want to have a home any plants. But not all have enough of this spirit, because for them will have to take care of. Yes, even just to water their flowers do not all have time, to say nothing about caring for this "green wall"! But the designer Winkel Maximilian (Maximilian Winkel) created a series of plants for the home called Schattengewachs, for which no need uhazhivat.Eti plants - from light.

Schattengewachs – домашние растения из света 
Schattengewachs - house plants out of the light

From a school course of natural history we know that many plants need light to grow and they were green. But houseplants Schattengewachs, created by designer Maximilian Winkel, need no light, but rather darkness. 
And it is not that this is the night flowers. This is, in principle, no flowers. After Schattengewachs are light installations as diverse flora. 
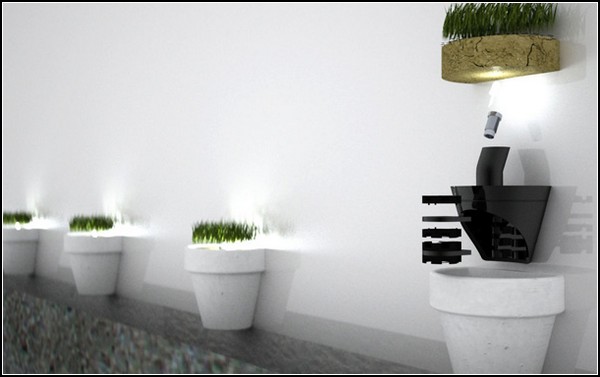
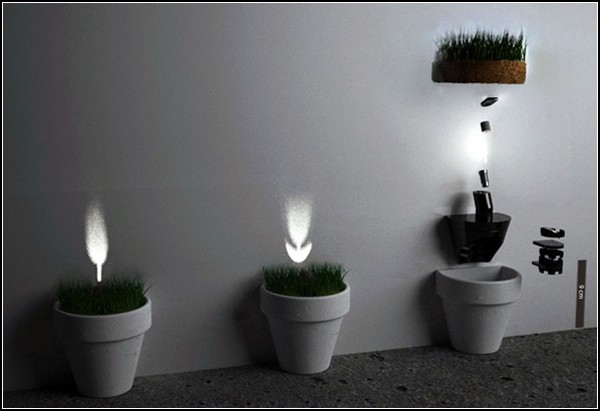
Moreover, they are all set in pots. These pots can even decorate with green grass (grass seed and the earth come with them included). But their main effect is achieved with light. 
Schattengewachs – домашние растения из света 
Schattengewachs - house plants out of the light

True, pots Schattengewachs need to install along the wall. And, when it begins to darken, become apparent that the vertical plane are displayed flowers, shrubs and even trees. Moreover, these plants are programmed to ensure that over time increasing in size, grow. 
Of course, Schattengewachs of Maximilian Winkel - this is not the most beautiful houseplants. But certainly - the most original and trendy. Light installations because of our time in high esteem. 
Schattengewachs – домашние растения из света 
Schattengewachs - house plants out of the light

It now remains to have another baby and pets: dogs, cats, hamsters, rabbits, made ​​of light. However, the latter, that is, sunbeams, already long been there.

Thứ Năm, 8 tháng 9, 2011

Beaurtiful pictures for your home: Exact-o Art tutorial

  
Art can be so expencive, so I decided to make my own. I love google images. I did a search for wrought iron wall art and  found one I liked. I also did a search on owls and came across a picture I fell in love with. I printed the designs out and taped the edges to a black 12x12 scrapbook paper and cut out the negative space using an exacto knife.

Once I finished cutting out I removed the template and trimmed the edges and mounted it on a white paper.
  
For the tree, I cut out the positive space on white paper, mounting it on black.
The frames are 12x12 and I got them half off at Hobby Lobby.


Source: showtellshare.blogspot.com

Chủ Nhật, 4 tháng 9, 2011

Paper crafts: Easy Crepe Paper Garland

DIY instructions below!
   
   
Paper crafts: Easy Crepe Paper Garland
Materials Needed:
Crepe Paper, Thin Gauge Wire, Scissors, Wire Cutter, and String
Step 1: Cut out the petals and the leaves. Taking stacks of the crepe paper cut out the shapes of the petals and also of the leaves. For the petals we made them 2.5″ wide and for the leaves we made them skinny about 4″ long. Take special care to get the shape you want since it makes a big difference what your flower looks like.
Step 2: Make the Flower. You need four petals for each flower. Take the first petal and roll it to make the center. Then take the second petal and wrap it around the first pinching it at the base. The last two flowers you should mold and stretch out with your thumb before adding them to the flower. Take a 5″ piece of wire and wrap it at the base of the flower to hold it in place. Leave the tail of the wire attached like a stem.
Step 3: Attach the flower to the string. Taking a few flowers and a few leaves hold them up to the string. Taking the tail of the wire fasten the leaves and flowers to the string by wrapping it around tightly. Clip off the extra wire with wire cutters. Et voilà! You have a pretty floral garland.
Source: ohhappyday.com