Hiển thị các bài đăng có nhãn Embroidery. Hiển thị tất cả bài đăng

Chủ Nhật, 25 tháng 9, 2011

Embroidered pictures for home decor: spring button flowers tutoriral

LA7_0865b

Embroidered pictures for home decor: spring button flowers tutoriral

DSC_0016b


Today we are turning buttons into flowers and making a cute handmade display-piece! Enjoy :)
You will Need:
  • Buttons that feel "Flowery"
  • Neutral Fabric (mine was a fine linen colored cotton)
  • Embroidery Thread (I used a few greens for the stems & yellow for the flower centers)
  • Small Needle
  • Scissors
  • Pencil or Invisible Marker
  • An embroidery hoop to be used as a frame
Freckled_Nest_Diy
Step 1: Space out your buttons on the fabric and mark a little pencil dot where you want each one. Like the example above, make sure to leave room for the stem below each button.
Step 2: Sew on the buttons all at once with one color of thread. Visit this post for tips on how to start and end your stitching.
LA7_0865b
Step 3: Stitch a straight dashed line below each button, starting just under the button and ending at an 'invisible horizontal line'.
LA7_0904b
Step 4: Frame your fabric in an ornamental embroidery hoop, hide or trim the fabric overhang in behind (I taped mine on the back).
Step 5: Hang your new artwork :)
LA7_0988b
I hung mine above my desk at the Studio :) This project would be fun as a button swap with friends (you could even do it on a teatowel)! Try it :)
Interested in another Button Craft? Check out this Cork Frame Project :)
2

Crafts lessons: braided chain stitch tutorial

braided_chain_stitch_7 
Crafts lessons: braided chain stitch tutorial
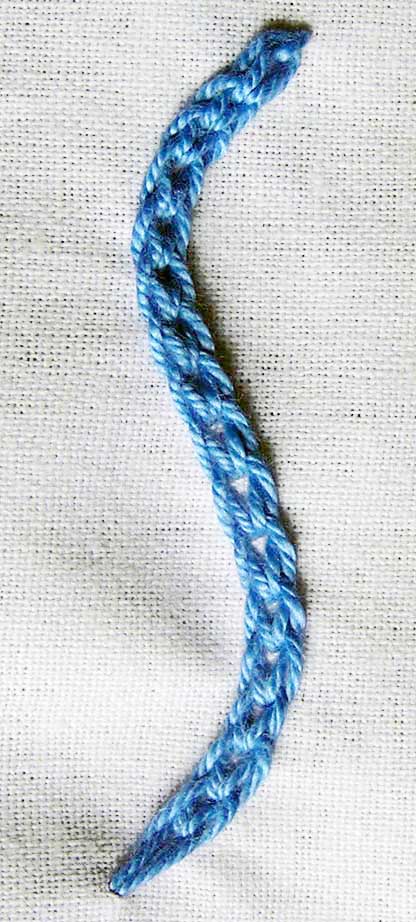
The braided chain stitch is worked almost the same way as the heavy chain stitch. There is only a slight difference in the way the needle is taken under the existing loops, thus giving it a totally different and embossed look. It  follows a reverse pattern like the reverse chain stitch and so we work it from top to bottom.
To work this stitch, you should be aware of at least the lazy daisy stitch. Knowledge of the reverse chain stitch and heavy chain stitch will only be more helpful. I will be working over a curved stitch line.
 
braided_chain_stitch_1     braided_chain_stitch_2
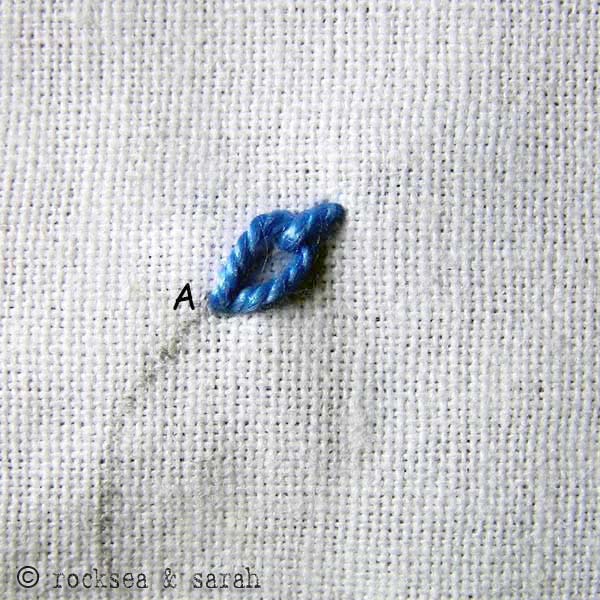
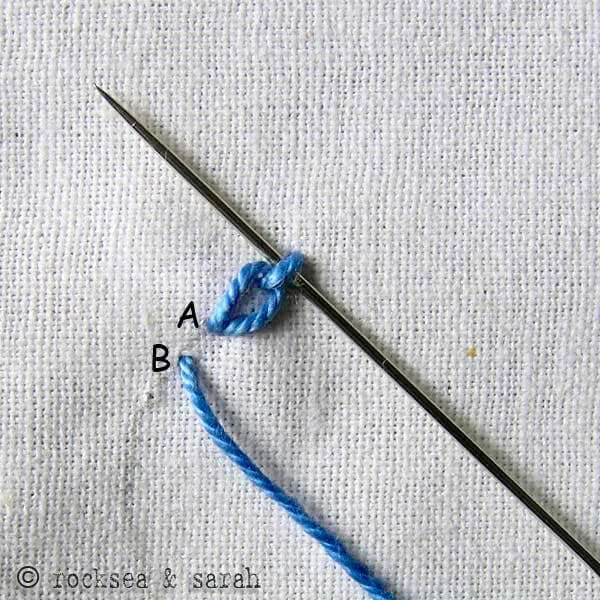
Fig 1: Lay the foundation by doing a lazy daisy stitch with a slightly longer tail, and the base as point A. Fig 2: Bring the needle out through B and take it under the tail of the lazy daisy without plucking the fabric.
   
braided_chain_stitch_3 braided_chain_stitch_4
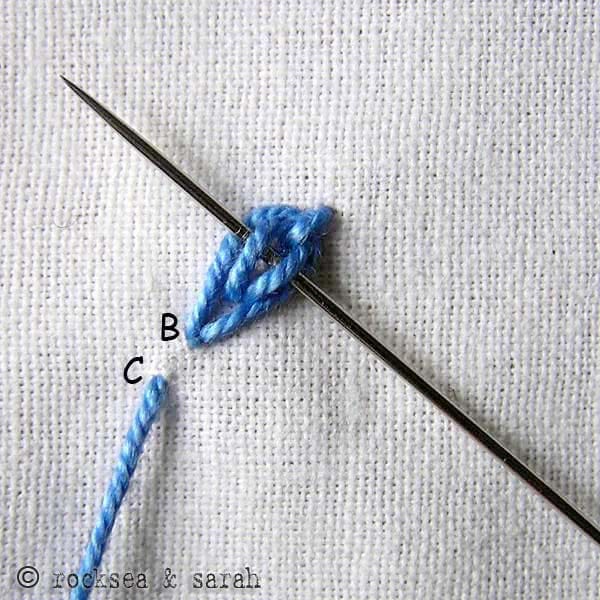
Fig 3: Put the needle back in B to get another loop, layering the lazy daisy from outside.
Bring the needle out through C. Take it over the outside loop and under the inside loop as illustrated. 
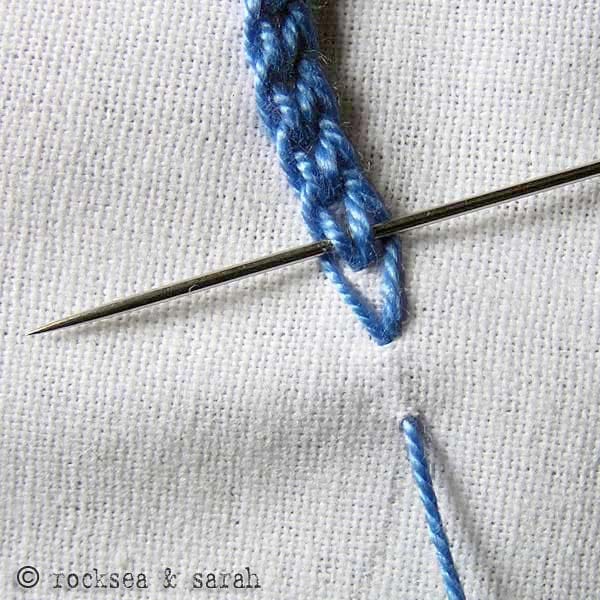
 Fig 4: Put the needle back in C to finish that loop.
Now Bring the needle back again through D and continue with the same procedure.
   
braided_chain_stitch_5 braided_chain_stitch_6
Fig 5: To make the taking of needle over and under the loops easier, here is a tip. Before tightening the ‘outer’ loop completely, you can take the needle under the ‘inner’ loop. Fig 6: You can then tighten the ‘outer’ loop by pulling the thread with your fingers and continue with the procedure.
   
braided_chain_stitch_7 Fig 7: A finished braided chain stitch will look like this. It has a slightly embossed finish.

Chủ Nhật, 18 tháng 9, 2011

Palm Leaves plastic canvas

[Karen Barbé · Textile designer · Palm Leaf Stitch – detail]


LEAVES

[Karen Barbé · Textile designer · Palm Leaf Stitch – diagram]


[Karen Barbé · Textile designer · Palm Leaf Stitch – detail]

I believe this is called Palm Leaf stitch.

Choose a yarn thick enough to cover the canvas rug (beware, it eats yarn) and follow the numbers in the diagram above. Bring the needle up in square 1 (bottom centre) and put it in square 2. Follow with the rest of the numbers. Bring the needle up in odd numbers squares (column in the middle) and put it in the squares with even numbers. It can be worked counter- or clockwise.

Thứ Bảy, 17 tháng 9, 2011

Art and Embroidered pictures:cross stitch kits


Art pictures: Girl face with buterfly, floweers and leaves

Thứ Ba, 13 tháng 9, 2011

Unique gifts: Embroidered Flowers with Buttons and Felt tutorial


I started by free-hand drawing the stems and then stitched the
m using a chain stitch.

I cut out a whole bunch of little circles made out of felt.

And then stitched them on using a cross in the middle of each flower using yellow embroidery floss.

And that was all! Easy peasy stuff, but looks so cute!


Both of the projects are hanging up on the side of my desk in my new dorm room! (I'll share pics of that...at some point)
Source: mygirlishwhims.blogspot.com