I just didn't have a spot in my house where the yellow would work. That, and it's no longer available. So, I attempted to make my own, and I really like how it turned out. If you want to make one too, here's what you do!
Rosette Pillow
And let me forewarn you, I am self taught when it comes to sewing. I don't know all the technical terms. I just do what works for me :)
STEP ONE: Cut fabric for the rosettes. You will need 9 strips of fabric, 5 inches wide by whatever your fabric measures from selvedge to selvedge (usually 45 inches).
STEP TWO: Fold in each long side toward the center about a 1/2 inch and press with iron
STEP THREE: Fold in half long ways and press with iron. Sort of like a big piece of bias tape.
Do this with all nine strips.
You will not need to reopen the folds, but this is what the creases will look like if done properly
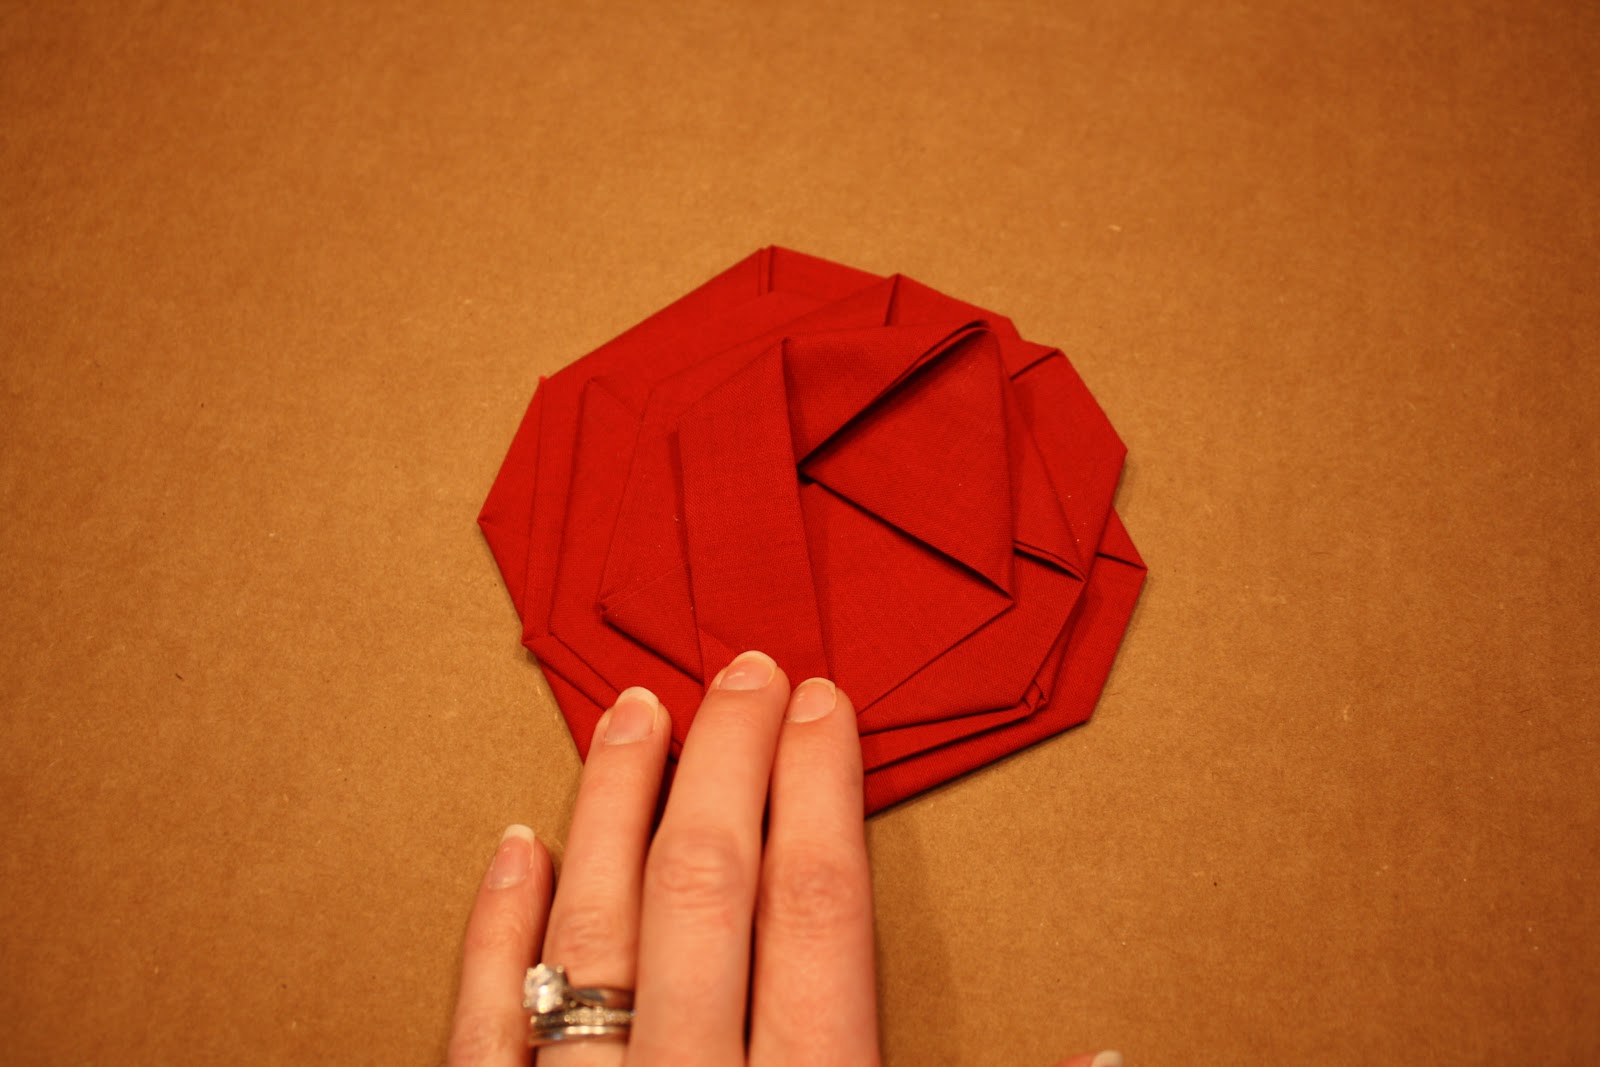
STEP FOUR: Create the rosettes. Lay one strip of fabric down with the open side of the fold facing right. Bring the rest of the strip up and over to the right so that it forms a 90 degree angle in the center and press with iron.
Bring the rest of the fabric up to form another 90 degree angle in the center and press with iron.
Now bring the rest of the fabric down and over to the left to complete the base of the rosette and again press with iron. This part will determine the width of the rosette (mine was 5 inches wide).
Keep repeating the same process bringing the fabric in closer to the center each time. Keep pressing with your iron to keep everything somewhat in place.
When you get to where you have about 10 inches of fabric left in length, fold long ways and press.
Now repeat the same process of folding the fabric in towards the center.
Stop when you have about 5 inches of fabric left in length.
Now instead of folding the fabric, start rolling it in towards the center and tuck the last bit of fabric behind the center of the rosette. Give it a really good press with the iron. Pressing with the iron will help you know where each of your folds are when you take it to your sewing machine. Much less frustration that way :)
Now you've just got to do that 8 more times!
STEP FIVE: Sew the rosette's layers together. Unfold the rosette (this is where pressing the folds comes in handy) and begin sewing at the first fold.
Once you get over the fold stop with the needle down in the fabric, release the pressure on your foot, and rotate the rosette clockwise. Place the pressure foot back down and start sewing again until you cross over the next fold. Keep repeating this process until you get to where you started rolling the fabric (the center of the rosette).
Refold/roll the center of the rosette back into place and stitch down using a needle and thread.
WAHOO!!! You're done with the rosettes!
Whew! Still with me?
STEP SIX: Cut your fabric for the pillow. I used my awesome FREE grain sack. My pillow form was 18x18 so I cut my piece for the front of the pillow 19x19 (allowing for a 1/2 inch seam allowance on each side). I did an envelope closure for the back so I cut two pieces at 19x12 each. The top of my grain sack was finished so I cut my back pieces keeping this in mind. This might make more sense later on.
STEP SEVEN: Pin your piping into place on the front piece of fabric. When you get to the corners, cut a series of slits into the piping to allow it to curve nicely.
STEP EIGHT: Bust out your sewing foot for piping and sew down your piping all the way around, overlapping the beginning and end of the piping.
STEP NINE: Place your rosettes onto the front piece of the pillow and pin in place.
STEP TEN: You can either tack them into place by hand, or use your sewing machine. I used my machine and just stitched around the inside of the base "petals".
View from the back after rosettes are sew on
STEP ELEVEN: Pin the back two pieces to the front of the pillow, right sides facing each other. The finished edges of the two back pieces should be towards the center of the pillow, one piece laying about 5 inches over the other at the center point. Of course, out of all the bazillion pictures I took for this project, I don't have one of this! But, this is what the back looks like when finished.
STEP TWELVE: Using your piping foot, sew the back pieces in place. The easiest way I've found to do this without messing up the piping is to turn the pillow around so that the backside of the front of the pillow is facing up (like the picture in Step 10). That way you can stitch directly over your previous stitches, using them as a guide. Stitch all the way around the pillow. You don't need to leave an opening since you're doing an envelope back.
STEP THIRTEEN: Trim any excess fabric and turn the pillow inside out.
STEP FOURTEEN: Insert
pillow form.
STEP FIFTEEN: Admire your work and pat yourself on the back!




 Crafts for home: crocheted pillows and rugs


